Emphasizing Your Point with Graphics with Word 97
What you will learn from this lesson
With Word 97 you will:
- Insert graphics or clip art into your document.
- Create and insert WordArt into your document.
- Create and insert do-it-yourself (DIY) graphics.
- Add drawing functions to the Standard toolbar.
What you should do before you start this lesson
Start Word 97.
Open a new document.
Exploring the lesson
The graphics capabilities of Word 97 are exceptional. Using Word 97, you and your students can create highly professional-looking documents with ease.
Inserting Word 97 graphics from the CD-ROM
Inserting graphics
- Insert the CD-ROM.
- On the Insert menu, click Picture, and then click Clip Art.
- Click the Clip Art tab.
- In the list of categories, select Academic.
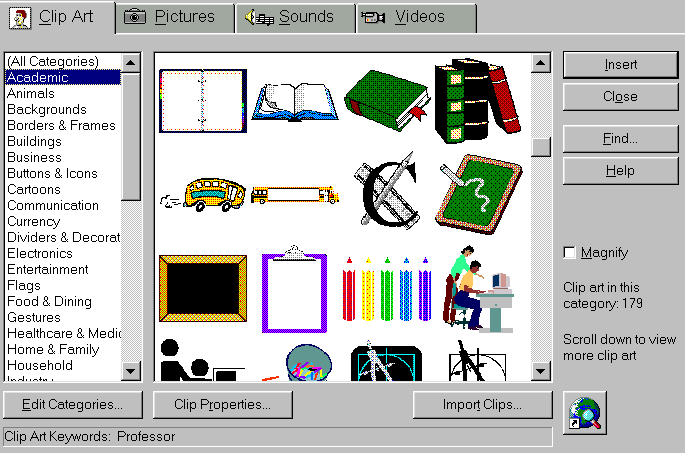
- Click the graphic of a teacher working with a student, and click Magnify to see it better.
- Click Insert to place the clip art in your document.
- Click the center of the image, and drag it across your document to see how the image moves.
- Click Undo.
- Click the square on the lower right of the image, and drag the image to fit the full width of the page.
- Click Undo.
- Close the document without saving changes.
Using WordArt
Using Word 97, you can easily insert graphics to catch a reader’s attention. Another way to generate interest is to use WordArt, a Word 97 feature that twists or bends text to give it visual interest.
Applying WordArt
- Open a new document.
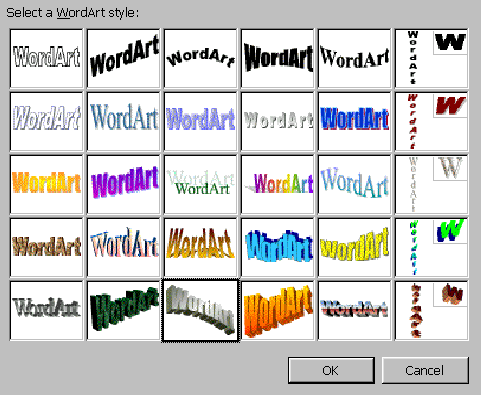
- On the Insert menu, click Picture, and then click WordArt.
- In the WordArt Gallery, click the third sample in the last row.
- Click OK.
Enter The Challenge where it says Your Text Here.
Click OK.
Click the Free Rotate button, position the pointer on the lower left green dot (below your text), and drag the pointer until your text looks like the following example.

Move the mouse pointer over each of the buttons to see how they can be used to change the image.
Click the Close button on the WordArt toolbar to close the toolbar.
Inserting do-it-yourself graphics
Using Word 97 you can create and insert do-it-yourself (DIY) graphics. The Drawing toolbar makes it easy to create original, one-of-a-kind graphics to enhance documents, reports, memos, letters, and student assignments.
Using the Drawing toolbar
With the document from the previous lesson still open, on the View menu, click Toolbars, and then click Drawing.

On the Drawing toolbar, click the Arrow button to change the insertion point into a crosshair symbol.
Click 2 inches below the C in the word Challenge, and drag the crosshair to the letter G.
On the Drawing toolbar, click the arrow next to the Line Color button, and choose the color for the arrow you have drawn.
On the Drawing toolbar, click the Arrow button again to change the insertion point into a crosshair symbol, and drag the crosshair symbol anywhere across the page.
On the Drawing toolbar, click the Line Style button, and click the solid 6-pt. rule.
Close the document without saving changes.
How you can use what you learned
Using Word 97, you can enhance your documents with graphics that are engaging, powerful, professional looking, and subtle. When you and your students add even one well-placed, appropriate graphic to your document, you can increase the effectiveness of your message.
Extensions
Toolbars can decrease the available system memory and slow your computer down. For that reason, you will want to customize your toolbars to include only buttons you frequently use.
Customizing your toolbar
In the “Creating an Outline with Word 97” chapter, you added outline tools to your toolbar by using the right-click menu. You can also use the Toolbar command to customize the Word 97 toolbars.
Adding the Arrow to the Standard toolbar
Open a new document.
On the View menu, click Toolbar, and then click Customize.
Click the Commands tab.
Under Categories, click All Commands.
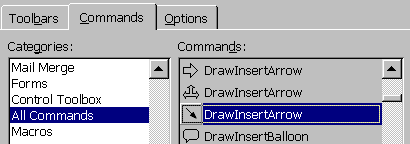
Under Commands, click the third DrawInsertArrow option, and drag it to the Standard toolbar.
Release the mouse button.
Click Close.
You can easily add buttons to the toolbars at any time. If you are the primary user of a computer, you may want to create your own custom toolbar that contains your favorite tools.
Adding other shapes to your documents
There are many ways to enhance your documents using Word 97. Keeping in mind the document’s purpose, tone, and audience, you can choose from a wide variety of graphics to strengthen your message.
Adding other shapes from the Drawing toolbar
With the document from the previous lesson still open, on the View menu, click Toolbars, and then click Drawing to display the Drawing toolbar.
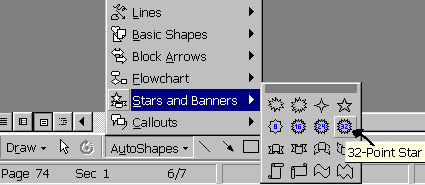
On the Drawing toolbar, click AutoShapes, Stars and Banners, and then the 32-Point Star.
Drag the crosshair diagonally across the page to create a star.
Grab the yellow diamond “handle,” and pull it gently to the center of 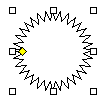 the star to create a new shape.
Click any of the other square handles around the star, and drag them to see what happens to your star.
Close the document without saving changes.

Other pictures that you can add to your documents are located on the CD-ROM used to install Word 97 or in Clip Art.
Adding pictures and videos
There are many ways to enhance the text with Word 97 features. You can bring in pictures, drawings, and even sound from the CD-ROM used to install Word 97, or you can add Clip Art, photo CDs and digital camera art. Use any of the sources available to complete the following exercise, keeping in mind, that you may not have access to the exact same images.
Adding photos, sounds, or even videos to your document
Open a new document.
Insert the program’s CD-ROM in the CD-ROM drive.
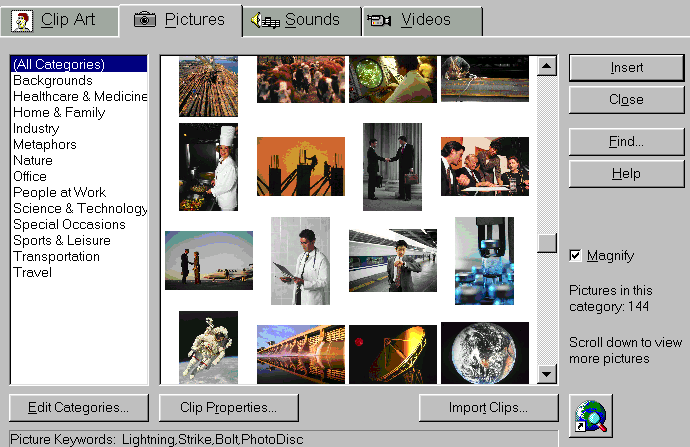
On the Insert menu, click Picture, and then click Clip Art.
Click the Picture tab.
Click the picture of your choice, and then click Insert to add it to your document.
- Click anywhere in your document except on the picture.
- On the Insert menu, click Picture, and then click Clip Art.
- Click the Videos tab to see available clips.
- Click the blowup video.
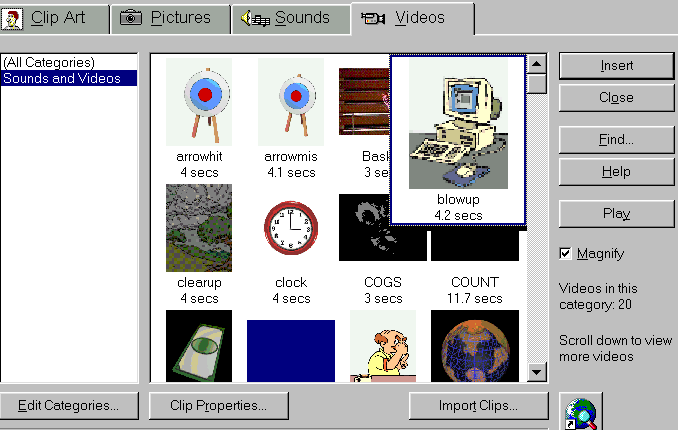
- Click Play.
- Click Insert.
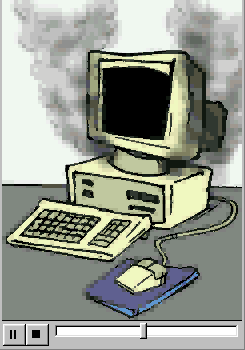
- Double-click Image to see the video play in your document.
- Close the document without saving changes.
Summarizing what you have learned
Through this chapter you have explored and practiced:
- Adding graphic interest to your documents.
- Inserting clip art into a document.
- Using the CD-ROM to add commercial clip art.
- Changing the size and shape of standard clip art.
- Creating attractive typographical art using WordArt.
- Creating DIY graphics with the Drawing toolbar.
- Customizing your toolbar to include drawing functions.
- Modifying drawings with graphic handles.
- Adding pictures and videos to your document.


![]()


 the star to create a new shape.


